Showing posts with label craft. Show all posts

Tuesday, November 17, 2015

Photo Keychain Upcycled Craft

I went to Knott's Berry Farm a while back and bought a keychain to accompany the photo that was taken by one of Knotts ever so eager employees.  Several years later...some way, some how, the photo disappeared leaving me with this.
 
 
Instead of throwing it in the trash (because it's not recyclable) I decided to "upcycle" it.  Ah, what to do with an old photo keychain.  The obvious answer is to put another Knott's Berry Farm photo in it.  Nah.  Besides, since this adventure, I've been on several other recent adventures I'd much rather attach a photo of to my car keys than this one.  So, I decided to create a name tag for my preschooler.  You know how every preschooler looses something as soon as they get to school.  Yep, that's the inspiration for this little upcycle.  Better yet, I thought it would be adorably noticeable to attach a name tag to his lunch pail.  When lunch time rolls around, there's going to be no way any of his classmates could mistake my sons lunch for theirs.  Muahahahah
 

SUPPLIES
  • Old Photo Keychain
  • Letter Stickers
  • Other Shiny Stickers
  • Star Confetti
  • Old Greeting Card, white on one side

DIRECTIONS
1. Pop out the clear plastic cover.
2. Cut out a rectangle from the old greeting card to fit the inside of the keychain.
3. Decorate the white side of the old greeting card with your childs name and other shiny stickers. (The shiny is important.)
4. Put the decorated name tag inside of the keychain and place a pile of confetti stars in the middle.
5. Put the clear plastic cover back into the frame and be careful to keep the confetti away from the edges while you're trying to pop it back into place.


Not only did this idea work.  It had an element of awesome to it.  The preschooler "Aden" loved it's shininess, it's personalization and didn't mind it attached to his lunch pail one bit.  As a matter of fact, his classmates adored it.  Not that's something to hoot about!
 
 
Whoot Whoot!

Sunday, November 15, 2015

Racing Turkeys Craft Kit by Uppity Owl

"Racing Turkeys"
by
Uppity Owl
 

On your marks, get set GO! What's better than a craft to keep your kids hands busy? How about one that can provide hours of play? These two competitive turkeys are a lot of fun to make as well as race. Now, I know what your thinking. Turkey's don't run let alone race! Well, let me put your mind at ease...feast your eyes on the turkey truth about racing: Turkeys Do  Run And Race!

Don't you feel so much better about making these competitive Racing Turkeys? I knew you would. ;)


TO PLAY RACING TURKEYS
You will need 1 dice and 1 ruler. Roll the dice and that's how many spaces your turkey moves. up the ruler. Whoever reaches 12 inches first wins!


Let's Make These Speedy Gobblers!

RACING TURKEYS


SUPPLIES
  • 2 Clothespins
  • Assorted colors of Feathers
  • 4 Google Eyes
  • Brown Construction Paper
  • Orange Construction Paper
  • Red Piping
  • Scissors
  • Glue Gun & Sticks
  • Paste

DIRECTIONS

1. Cut out the beaks from the orange construction paper. You can make a diamond shape and fold it in half to give it more of a 3D feel, or just a triangle.

2. Glue gun the feathers onto the end of the clothespin you press down on to open.

3. Paste the beaks on top of the side of the clothespin that opens up.

4. Glue gun the google eyes just above the beak.

5. Cut the red piping for the waddle and bend into the shape you'd like. Then use the glue gun to attach to the beak in between the eyes.

6. Cut the body out of the brown construction paper. Round one end and use the scissors to create several cuts into the rounded end. I used the glue gun to glue the body on.

Go Turkeys Go!

Friday, November 13, 2015

Turkey Puppet by Uppity Owl

"Turkey Puppet"
by Uppity Owl
 

Recently, the 6 year old and I took a day to craft and play. This turkey puppet was the result of my craftiness and my sons was this...

 
He said he wanted to make an owl mask, so this was my quick design to do so. But, I'm sure you can see it looks more like a super hero, and after he decorated his mask...it really looked like a super hero. lol Who cares, we both we're having so much fun!
 
So while my son created his super hero mask, I mean owl mask...I planned what I wanted my puppet turkey to look like. Lucky me though, I did have inspiration. Recently, I was able to craft a turkey costume for my husband. It was a church thing. It was so funny and awesome! It would take another blog post just to talk about the entire night. So, back to the costume...let's just say I had a lot of left over feathers. lol
 
"Gobble Gobble!"

"Waddle Waddle!"
 
 I'm sorry, but my husband is so much fun! Love him! :)

So, now that you know where my inspiration came from, here's how to make your own...


SUPPLIES
  • Scissors
  • Hot Glue Gun
  • Paste
  • Brown Paper Lunch Bag
  • Black Construction Paper
  • White Construction Paper
  • Orange Construction Paper
  • One Quarter
  • One Penny
  • Assorted Feathers: I used red, yellow, orange, brown and light brown. (It's what came in the package.) You will need a red feather for the waddle.
DIRECTIONS
  • Cut 2" - 3" off of the bottom of the bag.
  • Use quarters to trace circles for the eyes.
  • Use pennies to trace the black pupils.
  • Cut two beaks...one to go under the flap and one to go directly on top of it.
  • Paste all of the above onto the bag before adding the feathers.
  • Arrange the feathers in the order you'd like them to appear on the bag. Make sure they bend forwards.
  • Hot glue the feathers onto the back of the bag.
  • Finally, hot glue the red feather waddle onto the beak. If your feather waddle is covering up the entire beak...slightly wet your finger with some water to tame it to the side.

When your children can use their imaginations and lose themselves in make believe play, you know you've created something right!

Gobble Gobble!

Wednesday, November 4, 2015

Corn Wreath Thanksgiving Craft

It's that time of year, the weather is starting to chill and I'm once again reminded of why I savor the summer so much. Don't get me wrong, the winter is beautiful and the snow is to melt for...but, I love the sunshine and warm weather so dearly! Although, on the plus side, I've been able to drink some of my favorite pours as the season chill sets in. Coffee with a hint of hazel nut, hot tea...I almost had a hot chocolate tonight. Instead, I opted for a hot orange black tea, slightly sweetened. :)

If you find yourself inside avoiding the winter chills, and your little ones are bored, what could be better than crafting together? This fun and easy "Corn "Wreath" is so fun and would look great on your front door.

CORN WREATH

SUPPLIES
*Scissors
*Paper Plate
*Green Construction Paper
*White Construction Paper
*Yellow Tissue Paper

DIRECTIONS
A. Cut the middle out of your white paper plate. You should have a ring when finished.
B. Cut out the corn cobbs, then the corn husks.
C. Paste the yellow tissue onto the white corn cobbs.
D. Paste the green corn husks on the yellow tissued corn cobbs.
E. Before you add the finished corn to the ring, arrange them to get an idea of where they are going to go.
F. Add plenty of paste to the rim of the white ring.
G. Add the finished corn to the ring quickly, if you need to reposition, the paste will still be wet enough to just remove it from the ring. Don't press the corn down firmly until all of the corn has been placed exactly where you want it.

Hint: I use the middle ring/hole as a guide for placing my corn around the rim evenly.

Send me a photo of your finished craft and I'll add it to this post.

Enjoy!

Tuesday, November 3, 2015

Christmas Penguin Holiday Craft

I promise after this post I'll post some adorable Thanksgiving crafts. I just couldn't wait to get this guy (and Rudolph Leaps) onto the blog. This Christmas Penguin is so easy to make. With some scissors, construction paper, paste and some google eyes...he'll come to life in no time! 

Here's to getting the holidays crafted off right!

CHRISTMAS PENGUIN

DIY

Supplies
*Scissors
*Paste
*Black Construction Paper
*White Construction Paper
*Red Construction Paper
*Orange Construction Paper
*Google Eyes

Directions
A. Cut out all body parts
B. Assemble before pasting together
C. Paste the hat together first. Then paste the inner white body onto the black outer body, add the feet and arms, then the scarf. Be sure to cut the ends of the scarf to make it look more fringed. Lastly, add the hat to his head.

Don't forget to send me your creation...I'll add it to the end of this post with your permission.

Enjoy!

Saturday, March 30, 2013

Upcycle Craft - Owl Bag


Don't you just love looking at creative crafts that inspire?  It's one of the reasons I love Pinterest so much. It's a great place to get and share great ideas. This upcycle craft was inspired as such and I'm really excited to share it with you!
This Upcycled "Owl Bag" was constructed from a used cereal box upcycled with duct tape. It's a great way to "wrap" a gift for a friend, use to tote Hot Wheels around (as my preschooler does) or set on display with your latest owl loving decor. Whatever you do, you'll have a hoot of a time!

Materials:
  • Used Cereal Box
  • Duct Tape (3 different colors, 1 of them a shimmering color)
  • Wax Paper
  • Sissors
  • Ruler 
  • Owl Print of Choice to Trace
  • Pretty Rhinestones that match/stick or whatever else you'd like to use. ;0)


Step 1: Wrap

Tape the top flaps down to the inside of the cereal box. 


Then wrap the box with duct tape from the top to the bottom. Alternate your 2 different colors. Don't use your shimmering duct tape yet.


When you reach the bottom, and if you have any hang over, cut the sides then press them flat onto the bottom of the box.


Wrap the sides of the box from side, to the bottom, up the other side covering entirely. This will give a finished look on the sides.


Wrap the top of the box with the shimmering color.


Cut corners, fold down.

 
Now that the wrapping is done, it's time to start adding the details.


Step 2: Adding the Top Edging


Step 3: Make Handles
Measure two strips of tape, two different colors with one of them being the shimmering color.  Tape them together (sticky side to sticky side) and twist.


Tape handles to the inside of the box.  Then add a long strip of tape to the inside for an extra layer of support.


Step 4: Make Owl 
Trace an owl of your choosing onto a piece of paper. Place wax paper over the drawing and trace the drawing with a sharpie.


Cover drawing with shimmering duct tape. Do Not press the duct tape down at all. You want the tape to come off easily when you peel it off of the wax paper.


Flip over and cut along lines.


 Peel off wax paper.


 Tape onto the box. Press tape down firmly.


Step 4: Decorate!

I even decided to use the left over shimmering duct tape and wax paper to make some additional stick on decor.


I also added some matching stick on rhinestones.


Have a Great Weekend!
Whoo Whoo!
~OvO~

Monday, March 25, 2013

Upcycle Craft - Reusable Tissue Bag

Today I'll be sharing a green upcycle craft that will help eliminate the use of disposable tissues.  This project is super easy and provides plenty of room to be creative.
I'm working on eliminating the use of disposables in our household.  I've already been successful eliminated  disposable paper towels and napkins by replacing them with cloth towels and napkins. I even have cloth picnic napkins! ;0)  Since my 3 year old's nose is constantly...shall we say, active...I wanted to make an effort to stop buying disposable tissues and replace them with handkerchiefs.  This upcycle craft uses a plastic pinto bean bag I purchased from the grocery store.  This particular bag has a resealable top.
Here it is, enjoy!

Materials
  • 1 used plastic bag with a self sealing top
  • 3 different colors of duct tape
  • matching fabric 3" x 3" square
  • matching thread
  • needle for sewing thread
  • wax paper
  • sissors
  • hot glue gun
Step 1: Take your 3 different colors of duct tape and decorate your plastic bag. I choose to do strips because it was fast and easy.  


Step 2: Cut a 3" x 3" square out of matching fabric...larger or smaller depending on the size of plastic bag you're using.


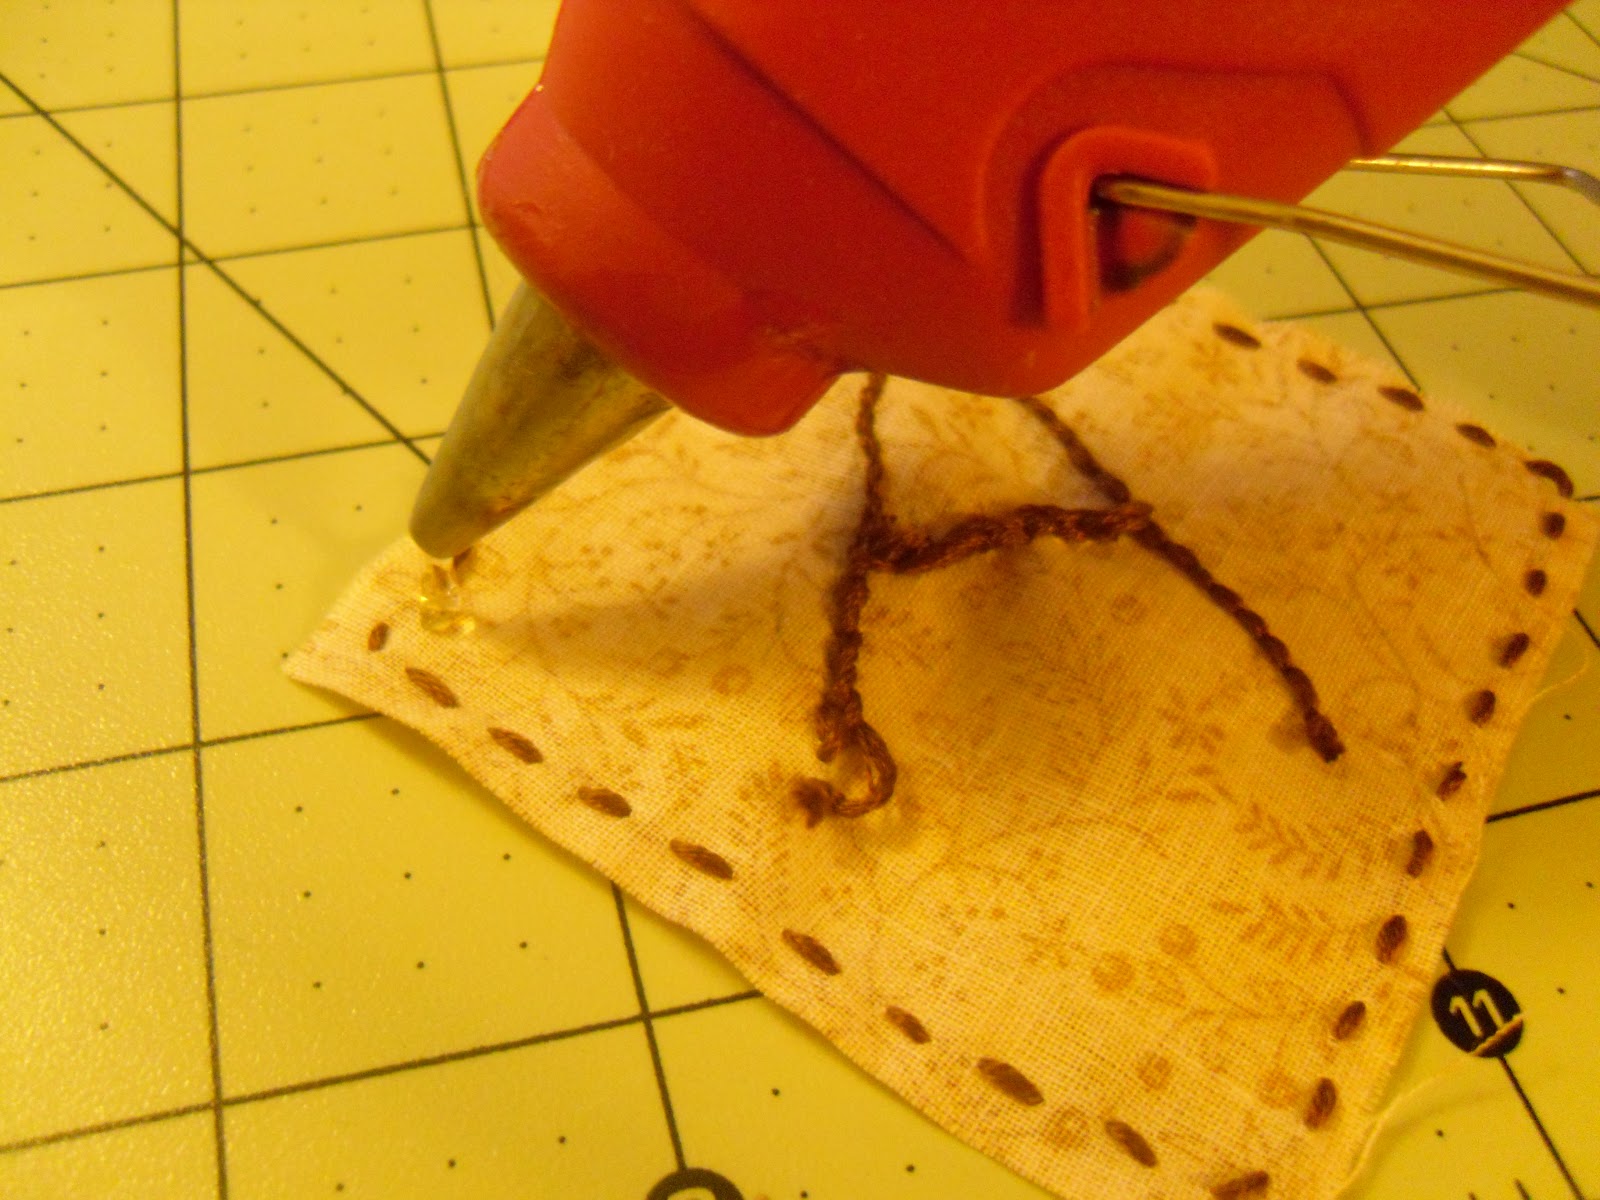
Step 3: Find some matching thread and stitch the edges. Then using a pencil on the back of the square, draw the letter you'd like to stitch then stitch it.


Step 4: Glue the square onto your decorated tissue bag.


Step 5: Add a handkerchief.


Now this craft is ready for the next nasal emergency!  I actually used my reusable tissue bag the other day and was so excited about not using disposable tissues.  I was even more excited about not having to worry about putting a dirty handkerchief in my purse...the "moisture" leaking onto other things in my purse. Plus, the fabric is 100% cotton, soft on the nose and comes in many other colors/designs.
Happy Nose Wiping the Green Way!
Whoo Whoo!
~OvO~